+
+

Intelligent Document Processing (IDP)

Overview:

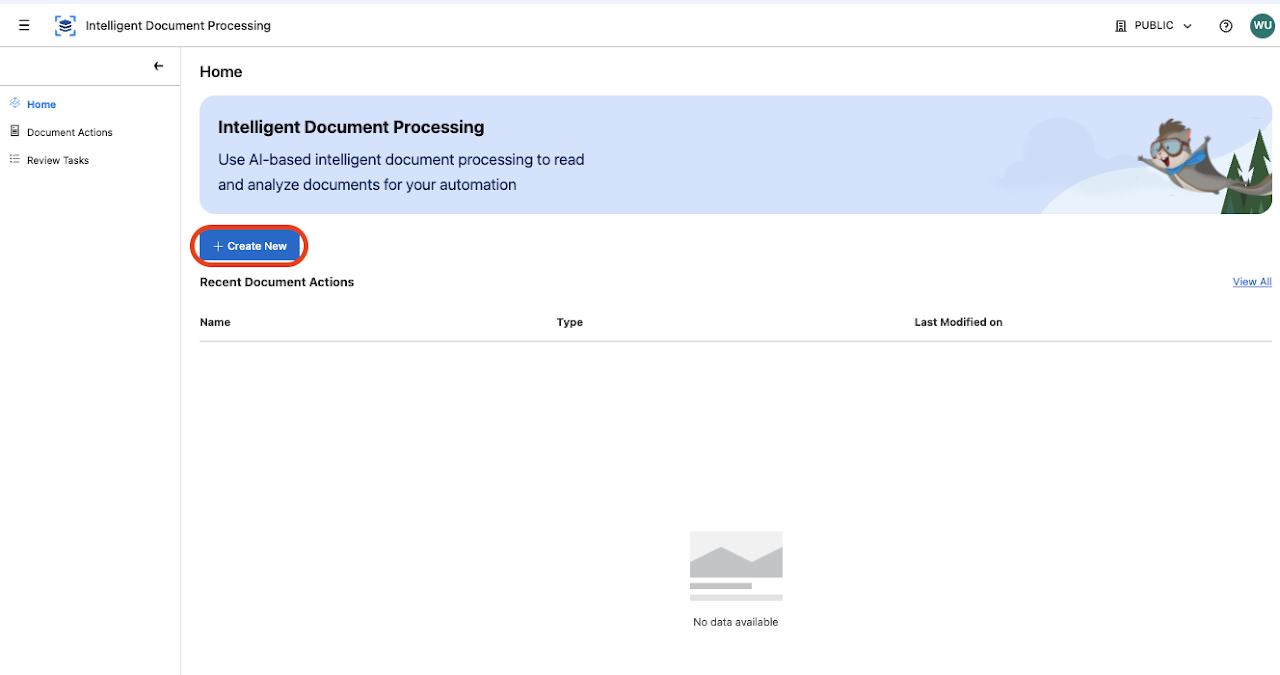
MuleSoft Intelligent Document Processing (IDP) enables you to read invoices, purchase orders, and other unstructured or semi-structured documents and then analyze and refine the extracted content using AI capabilities to create a structured response.

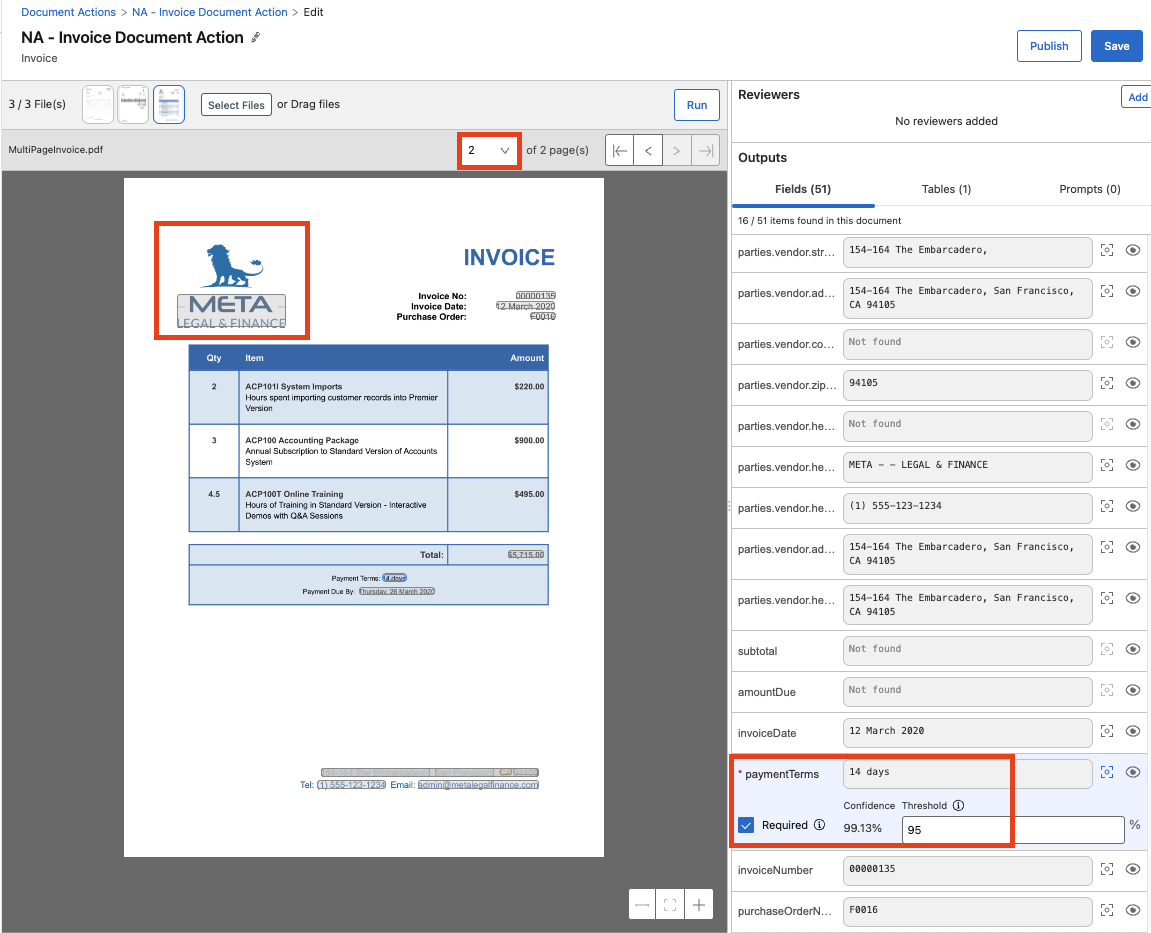
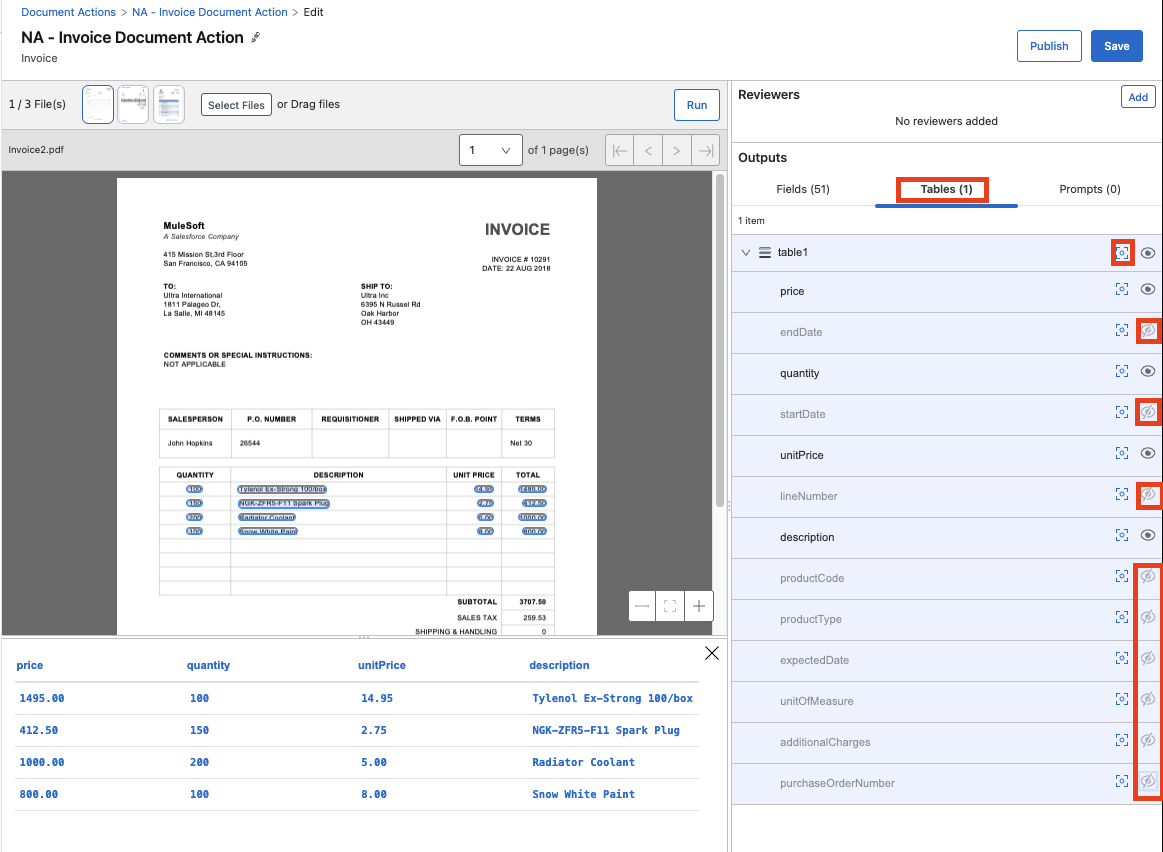
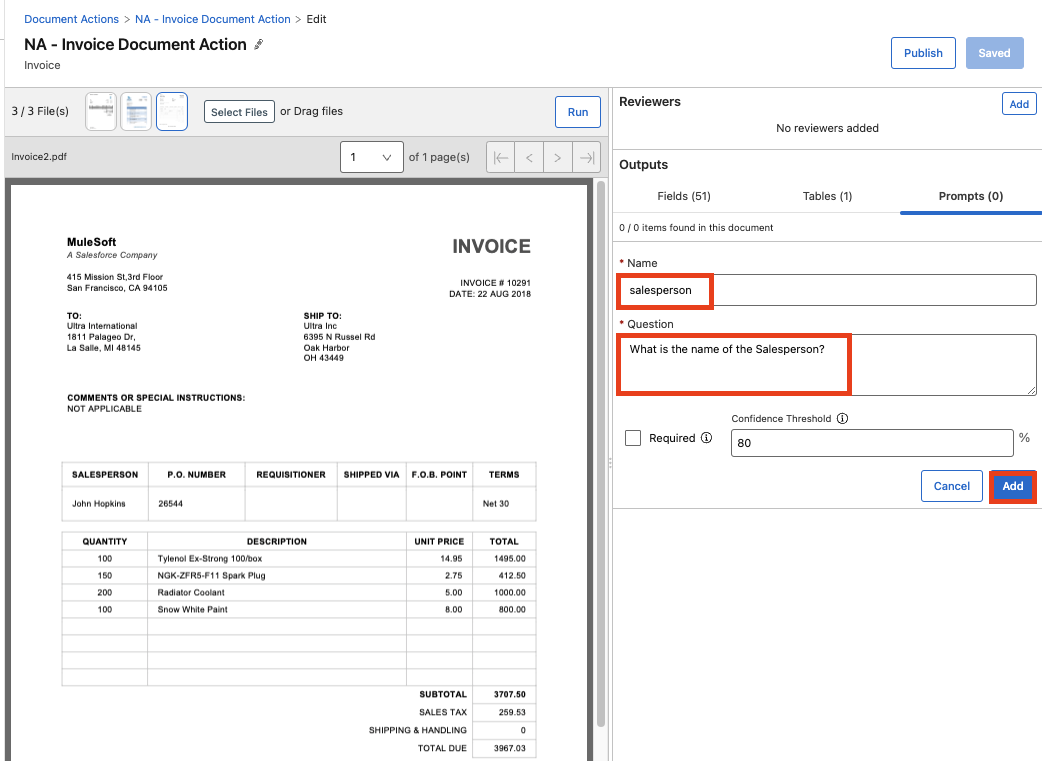
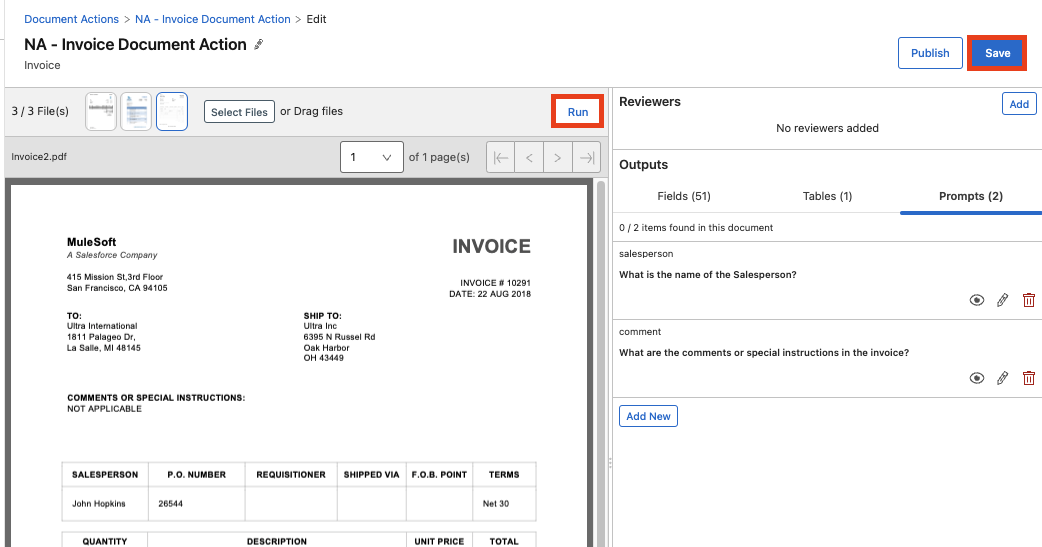
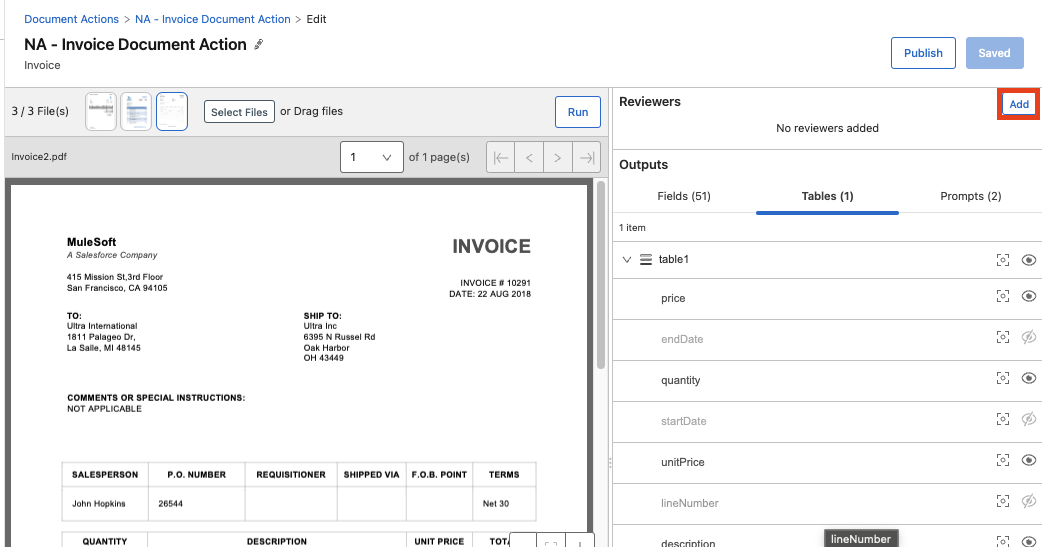
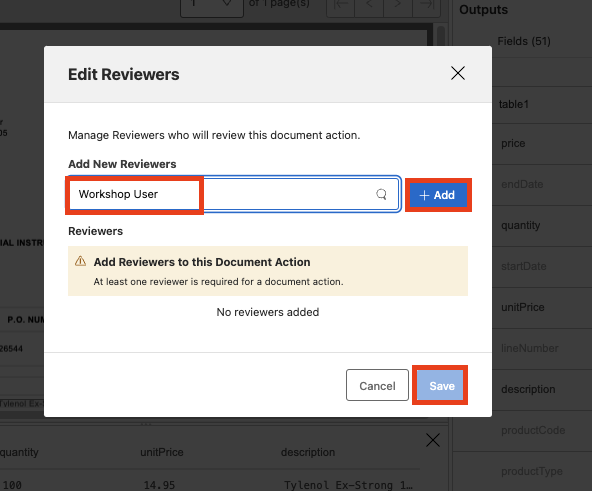
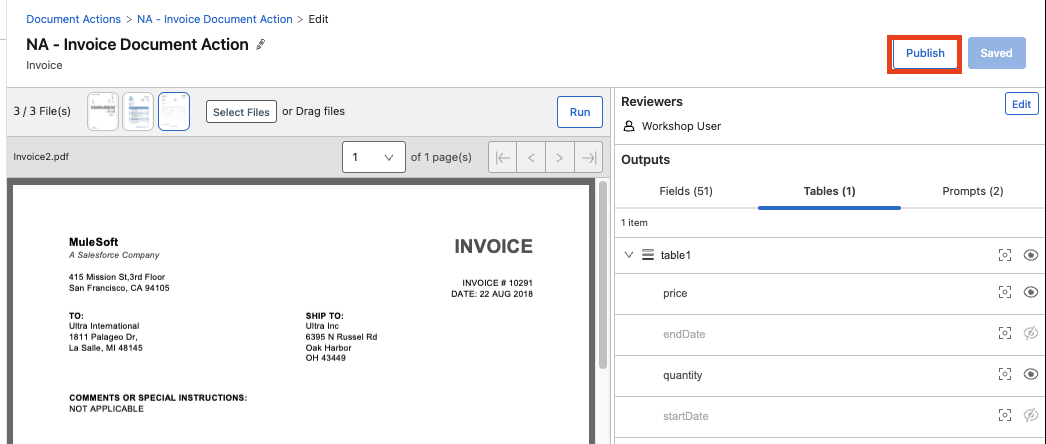
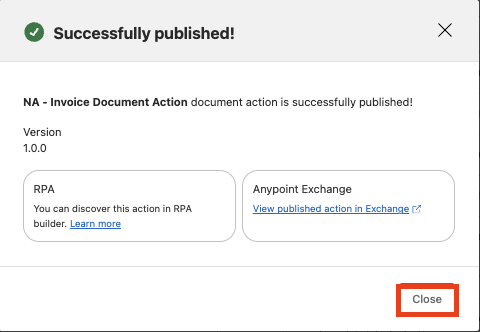
A document action is a multi-step process that uses AI engines to scan a document, filter out fields, and return a structured response as a JSON object. Each document action defines the types of documents it expects as input, the fields to extract, and the fields to filter out from the response. You can hide fields, mark fields as required, configure the minimum confidence score accepted for each field to extract, and configure Prompts to enhance and refine the data-extraction process by asking questions using natural language.

In this Module you will be using IDP to create a document action, selecting the fields to extract, adding thresholds for data-extraction and testing the document against the AI models.

Getting Started: Accessing IDP

  1. In a Google Chrome Window, log into the Anypoint Platform.

    URL: https://anypoint.mulesoft.com
    Username: workshop-user-1
    Password: <Provided by the instructor>
  2. Navigate to Intelligent Document Processing from homepage by clicking on 'Get Started'

Creating a Document Action

  1. Click Create New to create a new document action.

5 1 2

  1. Select Type as Invoice.

  2. Give the document action a name. Make sure to append the document action with your initials like NA - Invoice Document Action where NA is your initials

  3. Click Create

5 1 3

  1. Download the sample invoice files from Invoice Samples folder onto a folder on your laptop.

  2. Click on 'Select Files'. IDP accepts documents of format pdf, png and jpg.

  3. Select all the three invoices files downloaded in Step 1.

5 1 4

  1. Once files are added to IDP, click 'Run'

  2. Once IDP completes the processing of the files, observe the outputs and validate the extraction results for all 3 invoices.

5 1 5

  1. Locate 'paymentTerms' field in the outputs section and observe the extraction results in the 3 invoices.

  2. Click on the target icon to locate the payment term field in the document.

  3. Switch to Northern Trail Outfitters invoice. and observe paymentTerms field.The extracted data is highlighted in orange text.

  4. Click on the paymentTerms field in the outputs Section and check the confidence, the extracted data is highlighted in orange because the confidence fell below the threshold set.

  5. Switch to META legal & Finance invoice. and observe paymentTerms field.This is a multipage invoice, so navigate to page 2 to see the paymentTerms.

  6. Check the paymentTerm field checkbox as 'Required' and adjust the threshold to 95.Thus we are setting parameters to advise IDP to make sure that the paymentTerms field is always included in extraction and the confidence of extraction should never go below 95%.

  7. Observe the Table extraction by clicking on the 'Tables' tab in the Outputs section.Click on the target icon next to table1 to locate the entire table extraction in the document.

  8. Click the eye icon to remove the fields that are not needed

5 1 6
5 1 7
5 1 8
5 1 9

  1. Switch to the MuleSoft invoice and lets say we want to extract the salesperson’s name and any comments or special instructions included in the invoice. We know these are optional fields and good to include as part of our extraction. How do we extract those 2 data points? This is where we use the power of prompts.

  2. Click the 'Prompts' tab in the Outputs section.

  3. Click Add New

  4. Provide 'salesperson' as the identifier name and 'What is the name of the Salesperson?' as the prompt.

  5. Since its an optional field, leave the checkbox unchecked and the threshold as 80.

  6. Click Add

  7. Similarly, create a prompt for extracting the 'comments or special instructions' from the invoice.

  8. Click Save and Run.

  9. Observe the output of the prompts.

  10. Once the document action is complete, we can now publish the document action to Anypoint exchange, which is our repository of all reusable assets.

5 1 10
5 1 11
5 1 12

Publishing a Document Action: Optional for Workshop

  1. Before you can publish the document action onto exchange, you need to add a reviewer so that when processing documents in run time, the document action knows who to route the document for review.

  2. Click Add button in 'Reviewers' section.

  3. Select 'Workshop User' and click Add

  4. Click Save

  5. Click Publish

  6. Click Publish again to confirm

  7. Click Close on the successful confirmation pop up

  8. Our document action is now published in Exchange and can now be used as a composable asset in your anypoint integration flow or your rpa flow.

5 2 1
5 2 2
5 2 3
5 2 4

Invoking a Document Action

  1. Navigate to Anypoint Exchange

  2. Locate and click the 'NA - Invoice Document Action'

  3. Expand the endpoints and click on the POST method

  4. Review the auto-generated API documentation with instructions on how to invoke the document action.

  5. In order to invoke the document action, switch the server from Mocking service to the live idp endpoint

  6. Type 'file' in field name and click choose file and select any invoice file used during creation of document action

  7. Provide the following under credentials
    Client ID: f205a9bbc43e4a6eb90265a4c8161cff
    Client Secret: F90CD351E2384B9DaA2F585388b2B0bc

  8. Click Request access token

  9. Toggle Advanced settings

  10. Select Credentials location as 'Authorization header'

  11. Click Send

  12. You should get a 201 response code with a json response which means our document is successfully submitted for extraction.

  13. Copy the id from the json response.

5 3 1 2
5 3 1
5 3 2
5 3 3
5 3 4

Retrieving Results from a Document Action

  1. Expand the endpoints with executionId click on the GET method

  2. Review the auto-generated API documentation with instructions on how to retrieve the extracted data.

  3. In order to retrieve the document action, switch the server from Mocking service to the live idp endpoint

  4. Provide the execution id copied from the json response

  5. Toggle Advanced settings

  6. Select Credentials location as 'Authorization header'

  7. Click Send NOTE: If you get code 401 'Unauthorized' message, refresh the access token and send again

  8. You should get a 200 response code with a json response.

  9. Observe the 'status' key in the json payload If status is 'SUCCEEDED',then IDP has extracted all the data successfully If status is 'MANUAL_VALIDATION_REQUIRED',then IDP has routed the document for a user to review.

5 4 3
5 4 1
5 4 2

Reviewing Documents in IDP

  1. Navigate to IDP

  2. Click 'Review Tasks'

  3. Review the document in the queue and validate the extraction. In this case,IDP extracted the paymentTerms data but fell below the confidence Threshold,hence it was routed for review.

  4. Click Submit and Done

5 5 2
5 5 1

IDP - Explore More document Types: Generic Document Action

  1. If your document type is not Invoices or Purchase Orders, you can explore our Generic Document Action Model where you can extract data via prompts. Try it out.Here are some sample docs;

5 5 1

Submit your feedback!
Share your thoughts to help us build the best workshop experience for you!
Take our latest survey!