Module 3: Invoke MuleSoft RPA from Salesforce Flow
Overview
Salesforce flow is a powerful automation tool that automates complex business processes by collecting data and doing something in Salesforce or external system. Flow Builder is the declarative interface used to build individual flows. Flow Builder can be used to build code-like logic without using a programming language.
In this Module you will build a flow that invokes the RPA Bot that we build in Module 1 when a new record(Contact) is created in Salesforce.
For more information, refer to the Salesforce Flow Builder documentation for configuration and usage details
Salesforce Flow Builder: Getting Ready
-
In a Google Chrome Window, log into the Salesforce with the URL and credentials below. This is the environment where you will create the flow that invokes a bot upon creation of a new contact and will get an email notification.
URL: https://automationworkshop-23.my.salesforce.com
Username: automationworkshop@nto.com
Password: <to be provided by the instructor>
Navigating to Flows
-
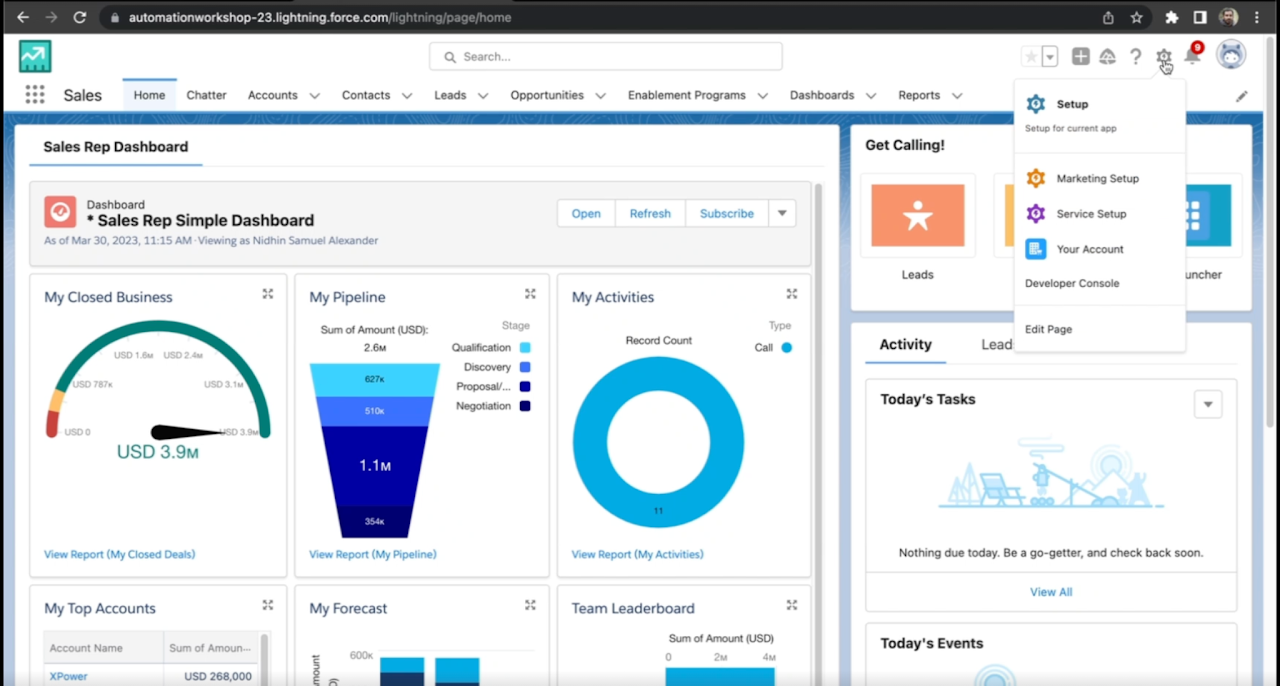
Click on the gear icon located at top right of the landing page and select 'Setup' option
-
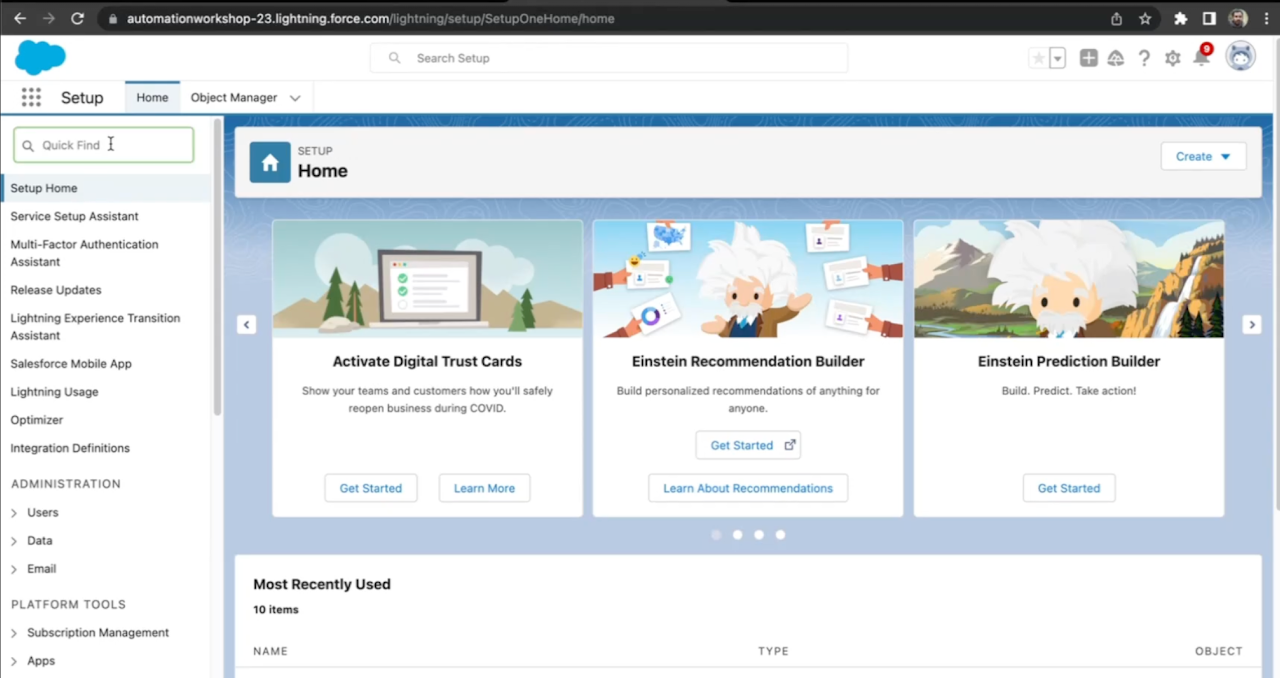
Click on Quick Find on left side of the page and type in 'Flows'.
-
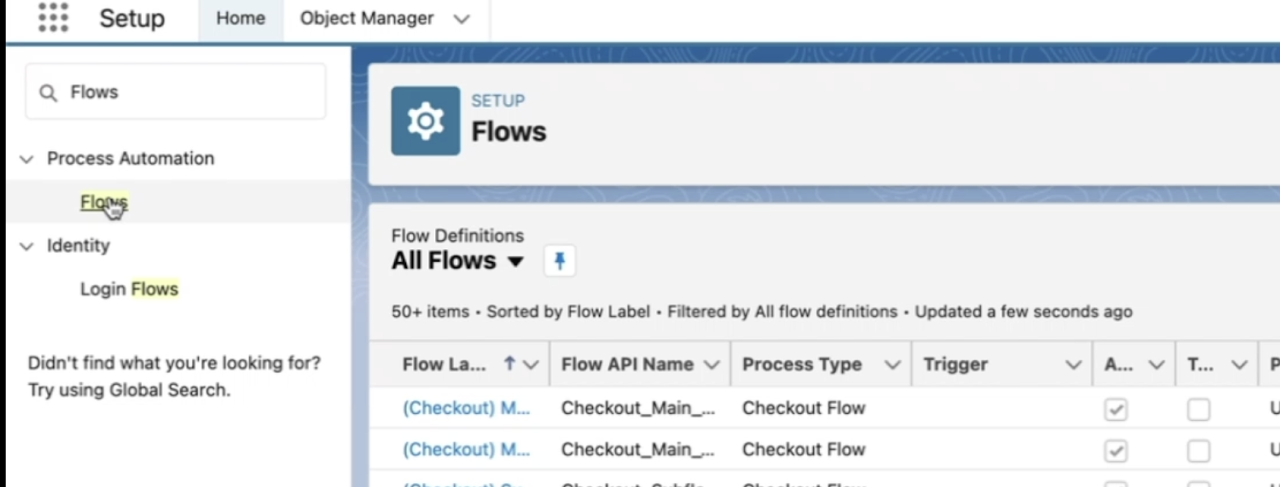
Select the Flows under Process Automation
Creating a New Flow
-
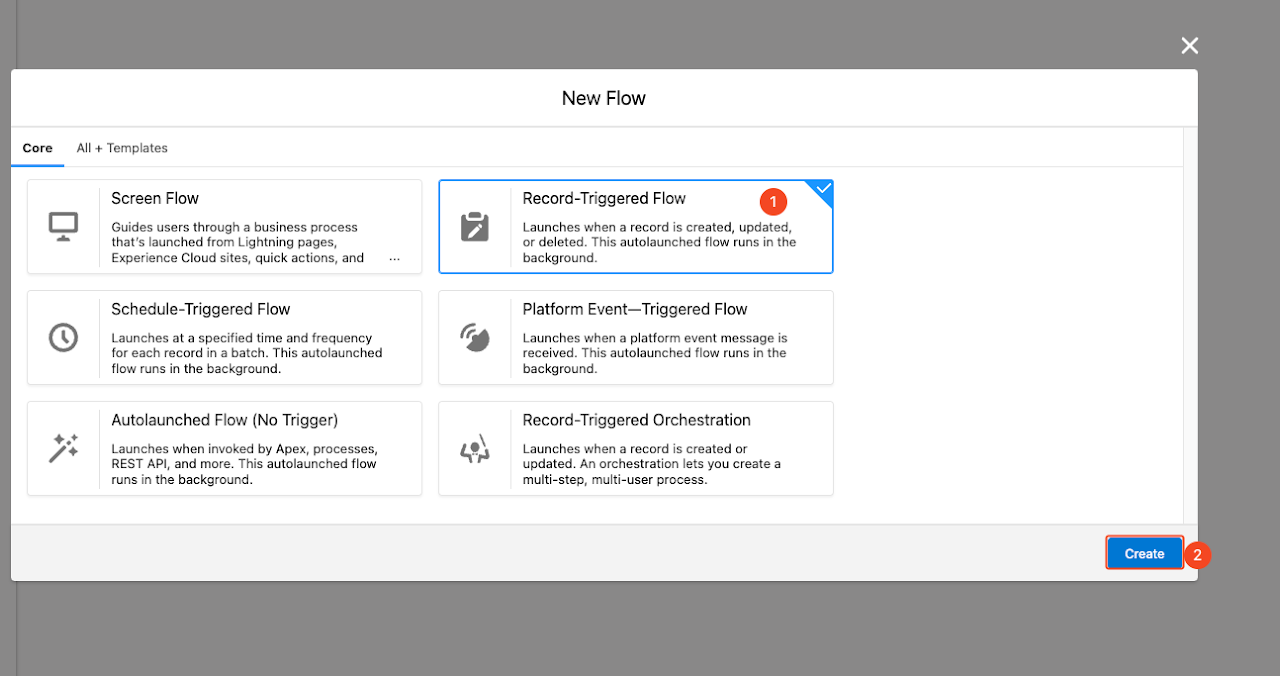
Select Record-Triggered Flow
-
Click Create
-
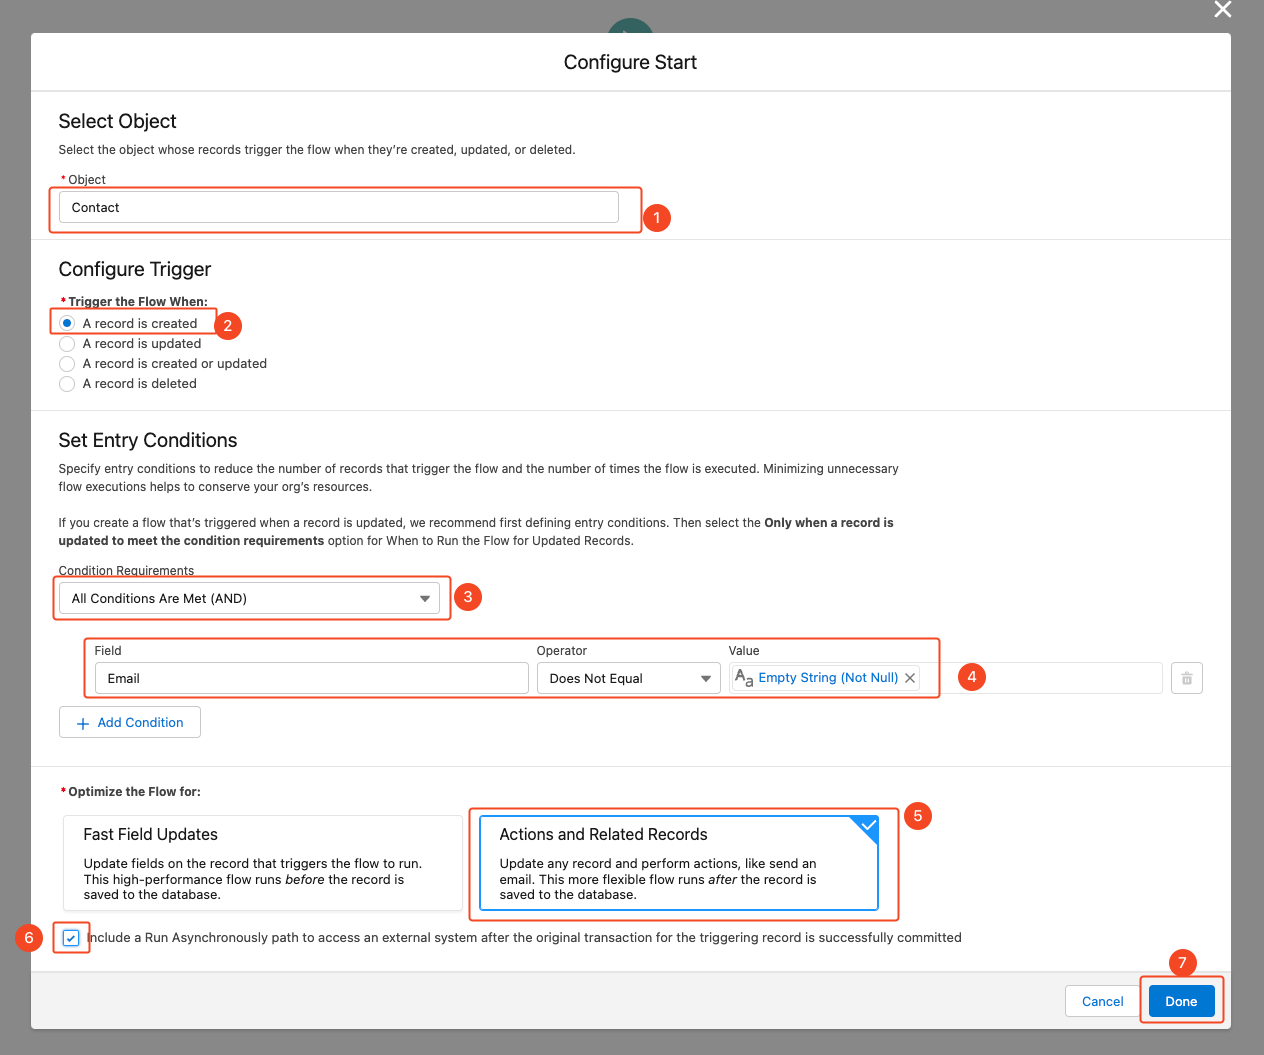
Type 'Contact' in the Object text box and Select 'Contact'.
-
Select the trigger as 'A record is created'
-
Select the Condition requirements as 'All Conditions are Met (AND)'
-
Configure the Email field to satisfy the Condition as not null
-
Select 'Actions and Related Records' option to Optimize the flow for.
-
Click the checkbox to include a 'Run Asynchronous Path'
-
Click Done
Variable Assignment
-
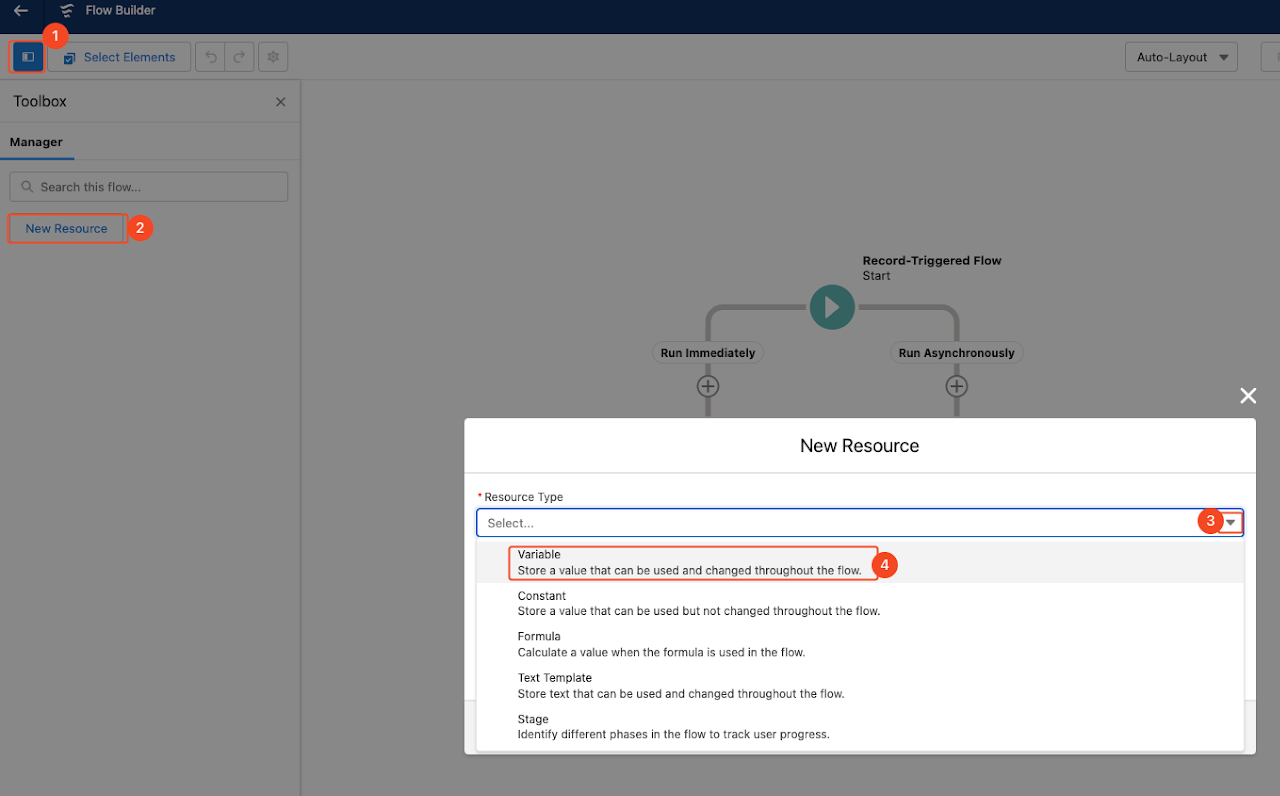
Click Toolbox icon
-
Click New Resource
-
Expand Resource type drop down
-
Select 'Variable' as Resource type
-
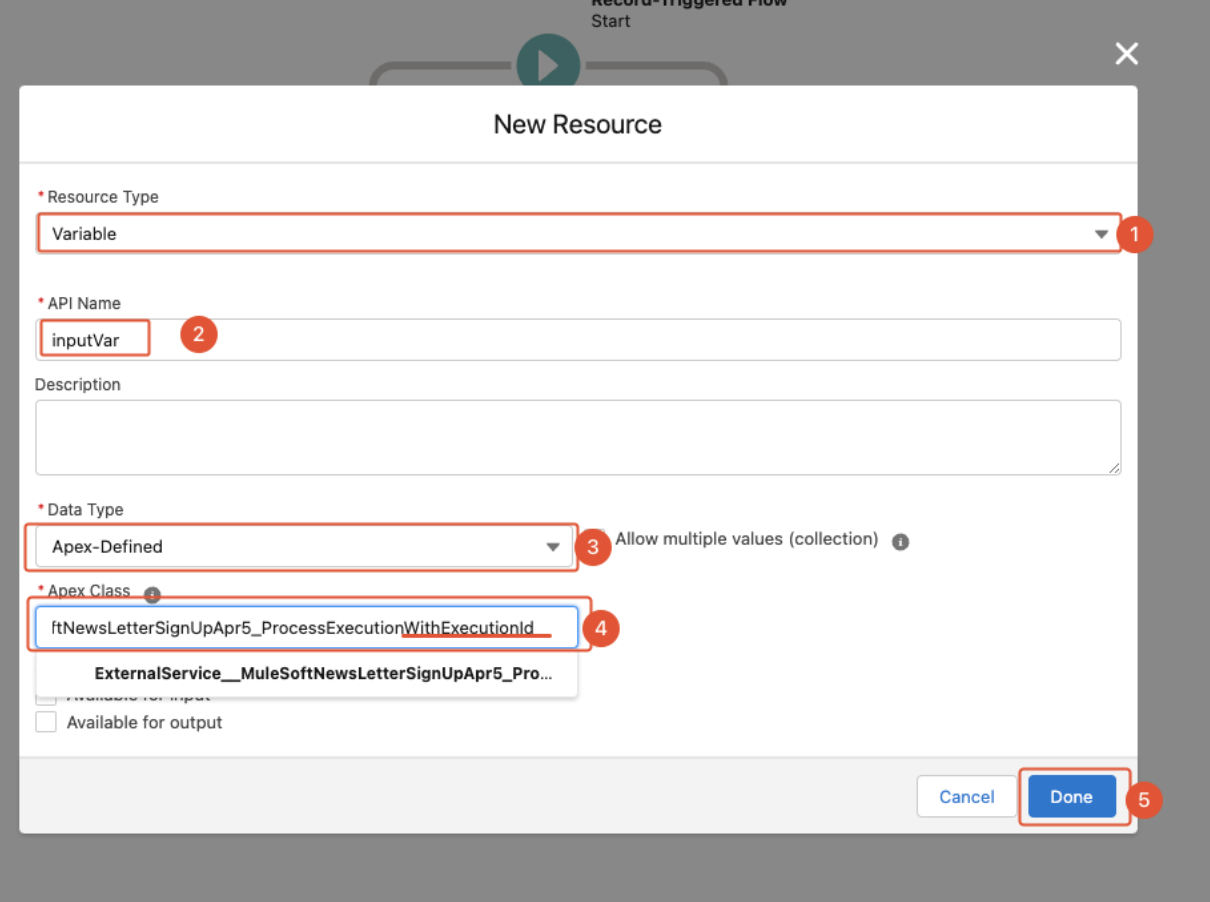
Ensure your Resource type is Variable
-
To more easily follow the later steps use inputVar as the API Name
-
Set the Data Type as Apex-Defined
-
For Apex Class enter the text below
ExternalService__MuleSoftNewsLetterSignUpApr5_ProcessExecutionWithExecutionId
-
Click Done
-
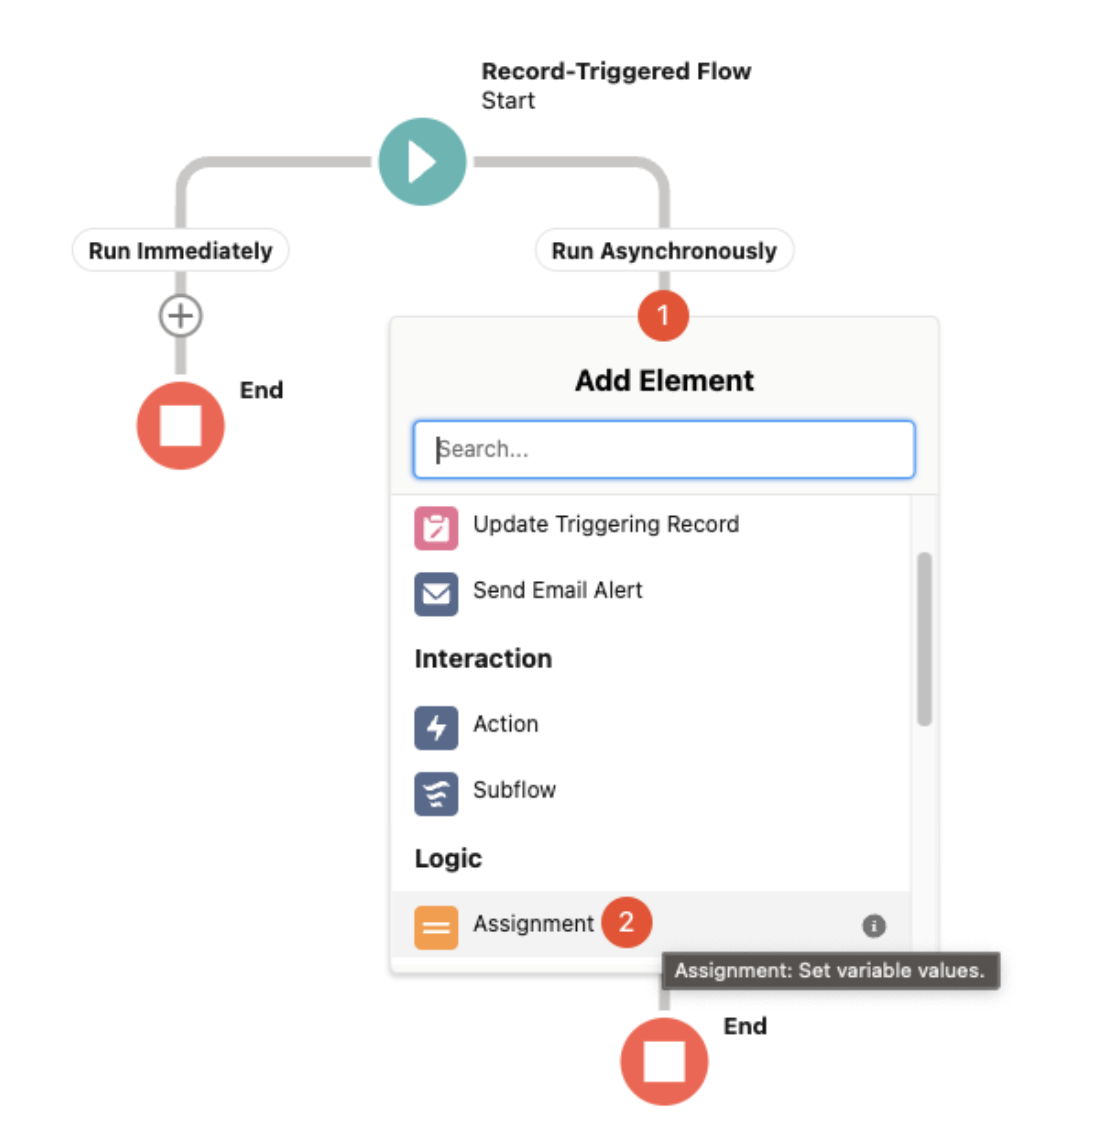
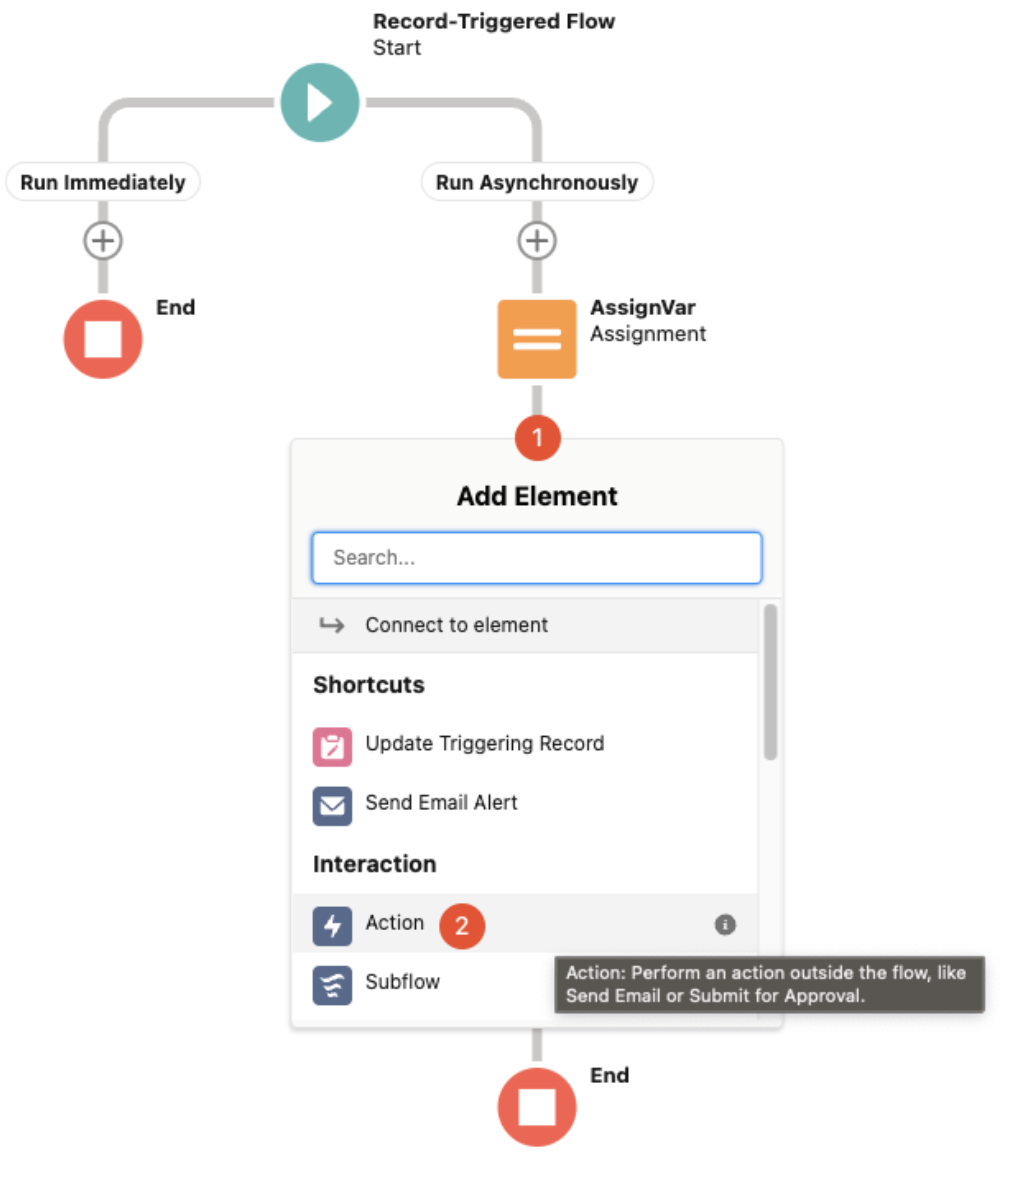
Click the plus sign to add an Element.Make sure you add the element under 'Run Asynchronously' path
-
Click on Assignment
-
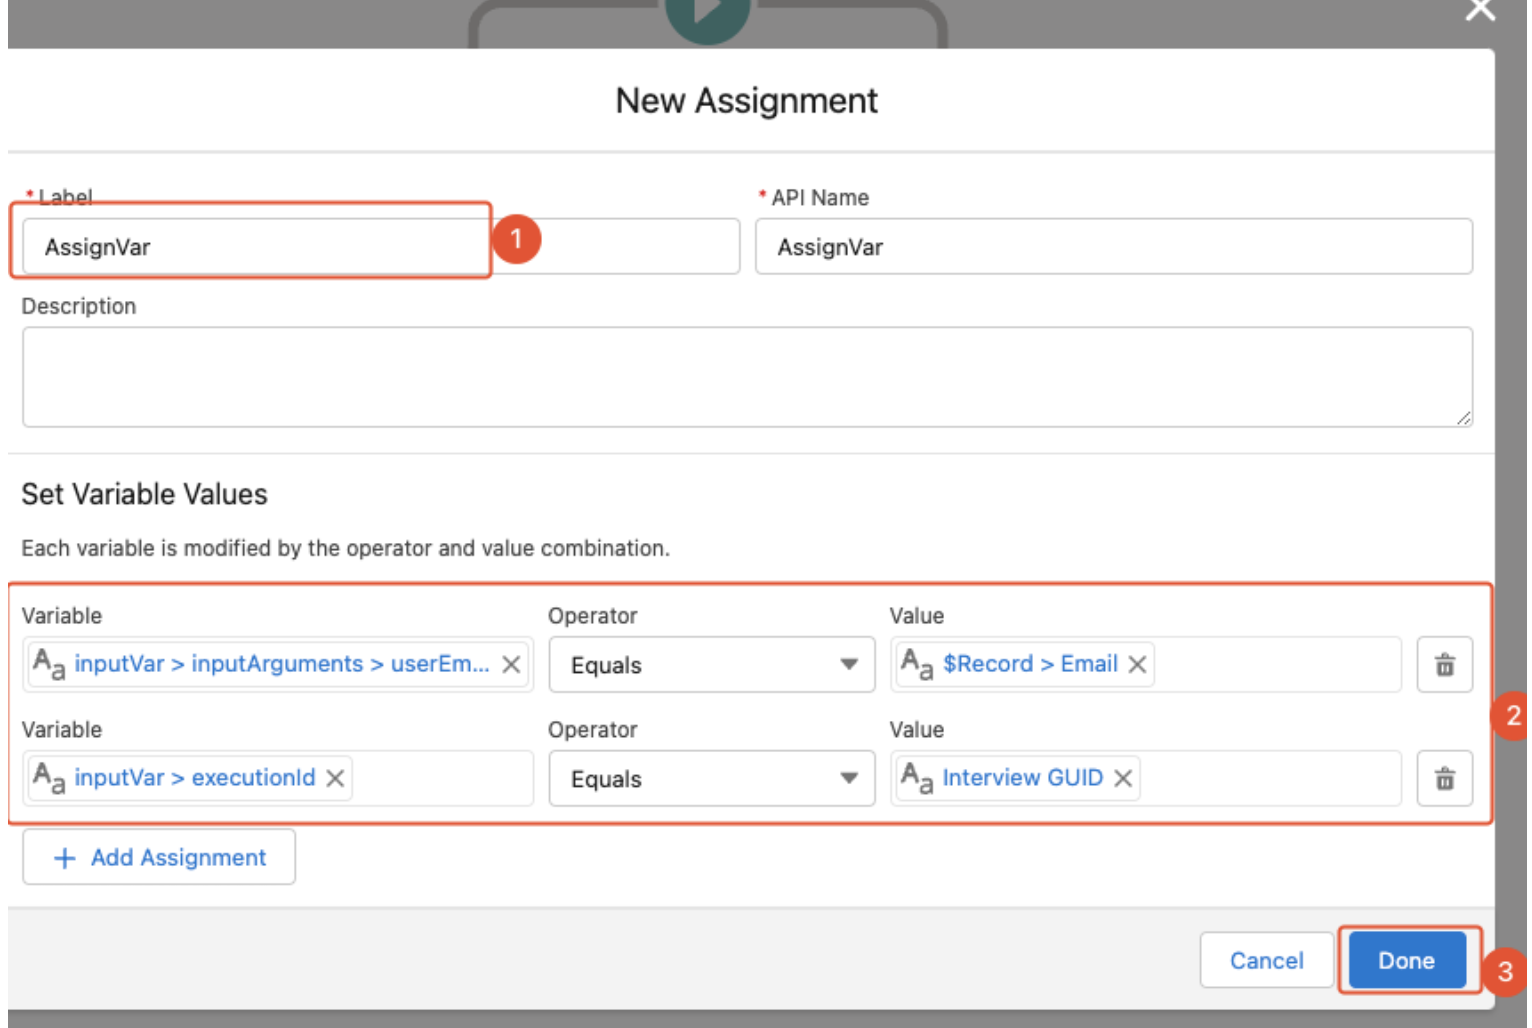
Label your Assignment as "AssignVar"
-
API Name will Automagically populate
-
-
Set Variable Values
Use Equals for the Operators .. {!inputVar.inputArguments.userEmail} .. {!$Record.Email}-
{!inputVar.executionId}
-
{!$Flow.InterviewGuid}
-
-
Click Done
Add RPA Bot to an Action
-
Click on plus sign after the 'Assign' Element
-
Select 'Action' under Interactions
-
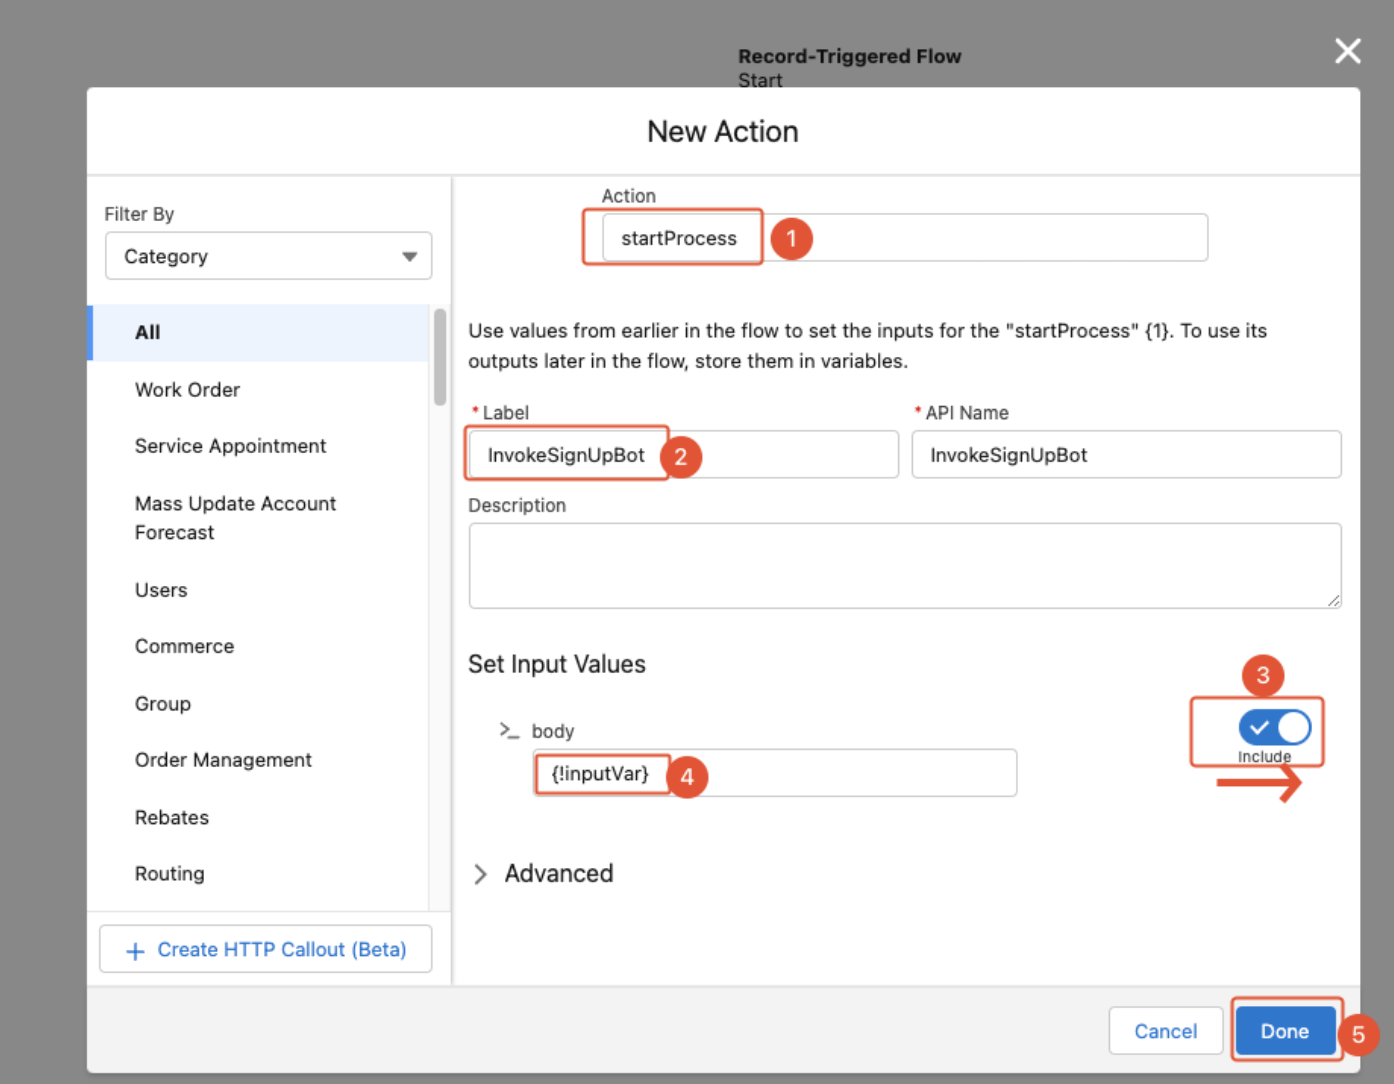
Type and select 'startProcess' in Action text box
-
Label the action as 'InvokeSignUpBot'
-
Toggle on the include to set the body.
-
Type '{!inputVar}' in the body.
NOTE - When you start typing,the variable might auto-populate with a '.' at the end like this {!inputVar}.', make sure the '.' is removed before proceeding.
Save the Flow
-
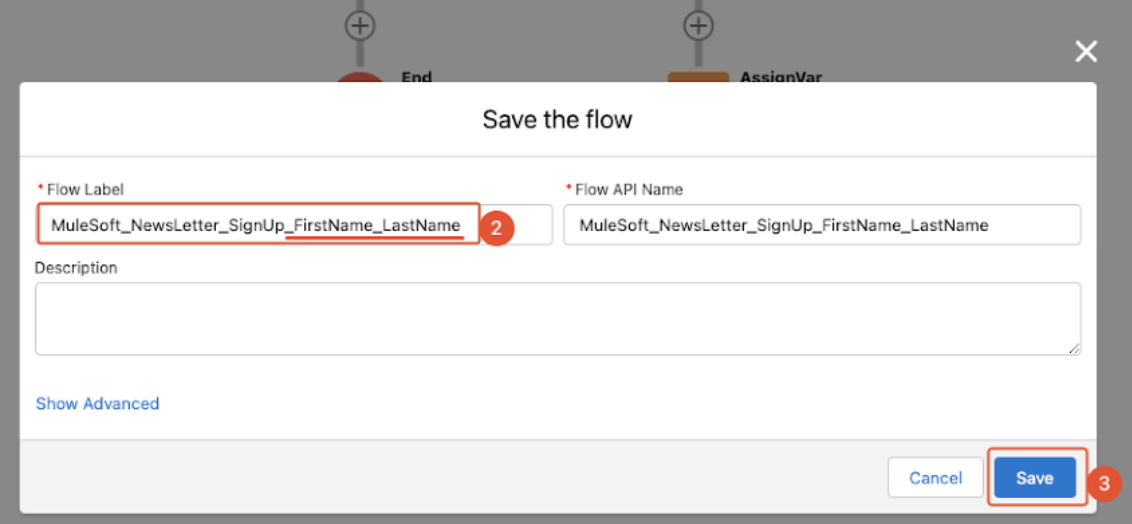
Click Save
-
Label the Flow with your first and last name. eg:- If my name is Jane Doe, Label the flow as 'MuleSoft_NewsLetter_SignUp_Jane_Doe'
-
Click Save
Debuggig and Validating the Flow
Before we Debug the flow, let’s first create a Contact(which is the Object the flow is configured to trigger on)
-
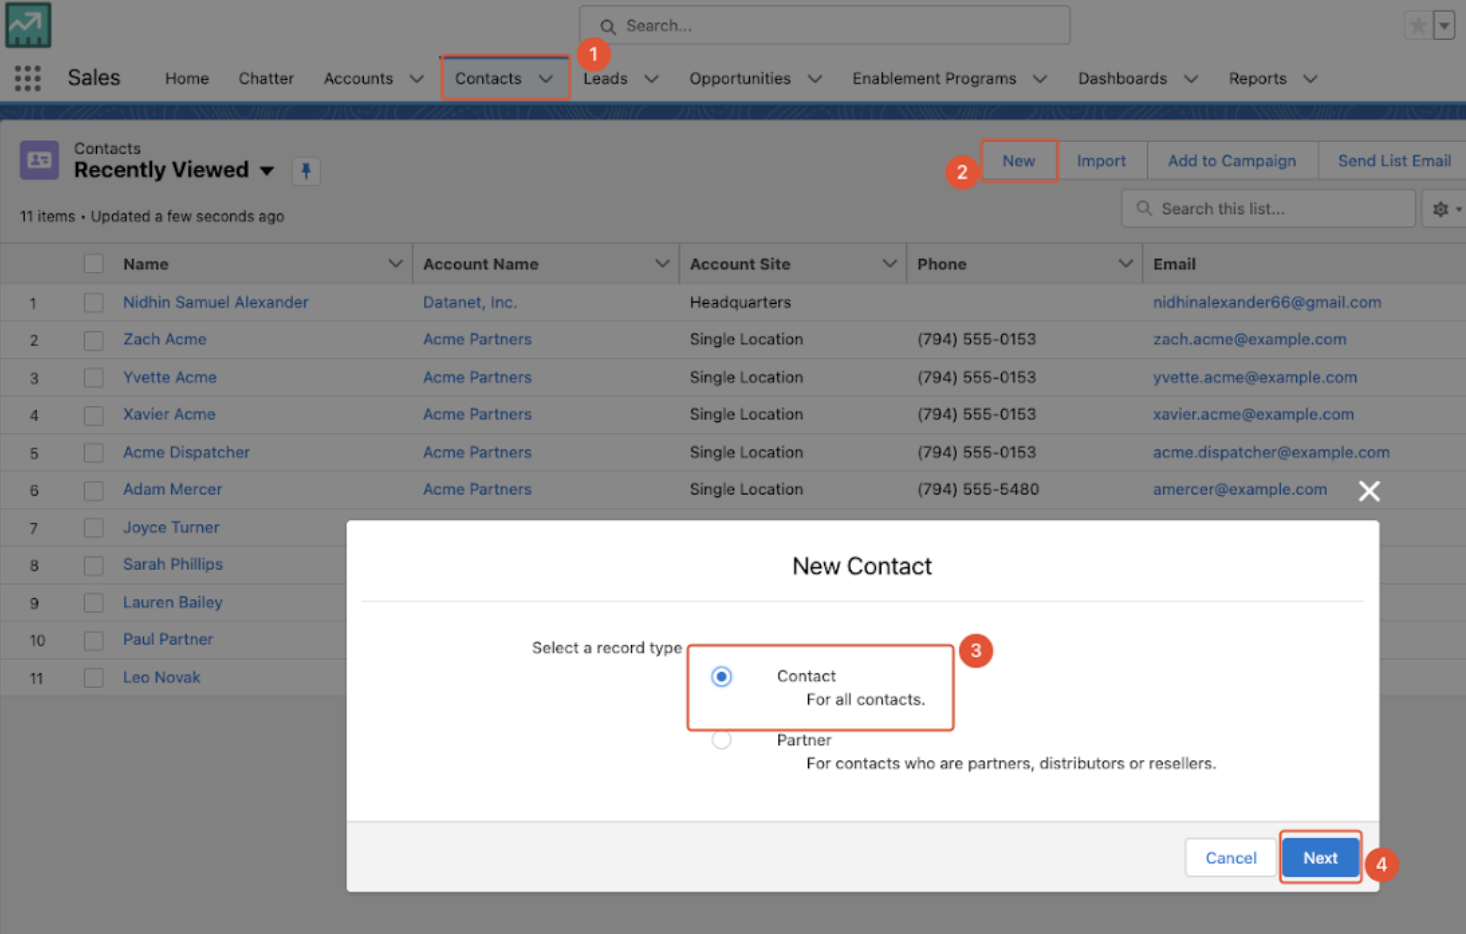
Open another tab of the Salesforce Org and click on the square made up of 9 dots.
-
Search for contacts
-
Click Contacts

-
Click 'New' Button to create a new Contact
-
Select the 'Contact' record type
-
Click Next
-
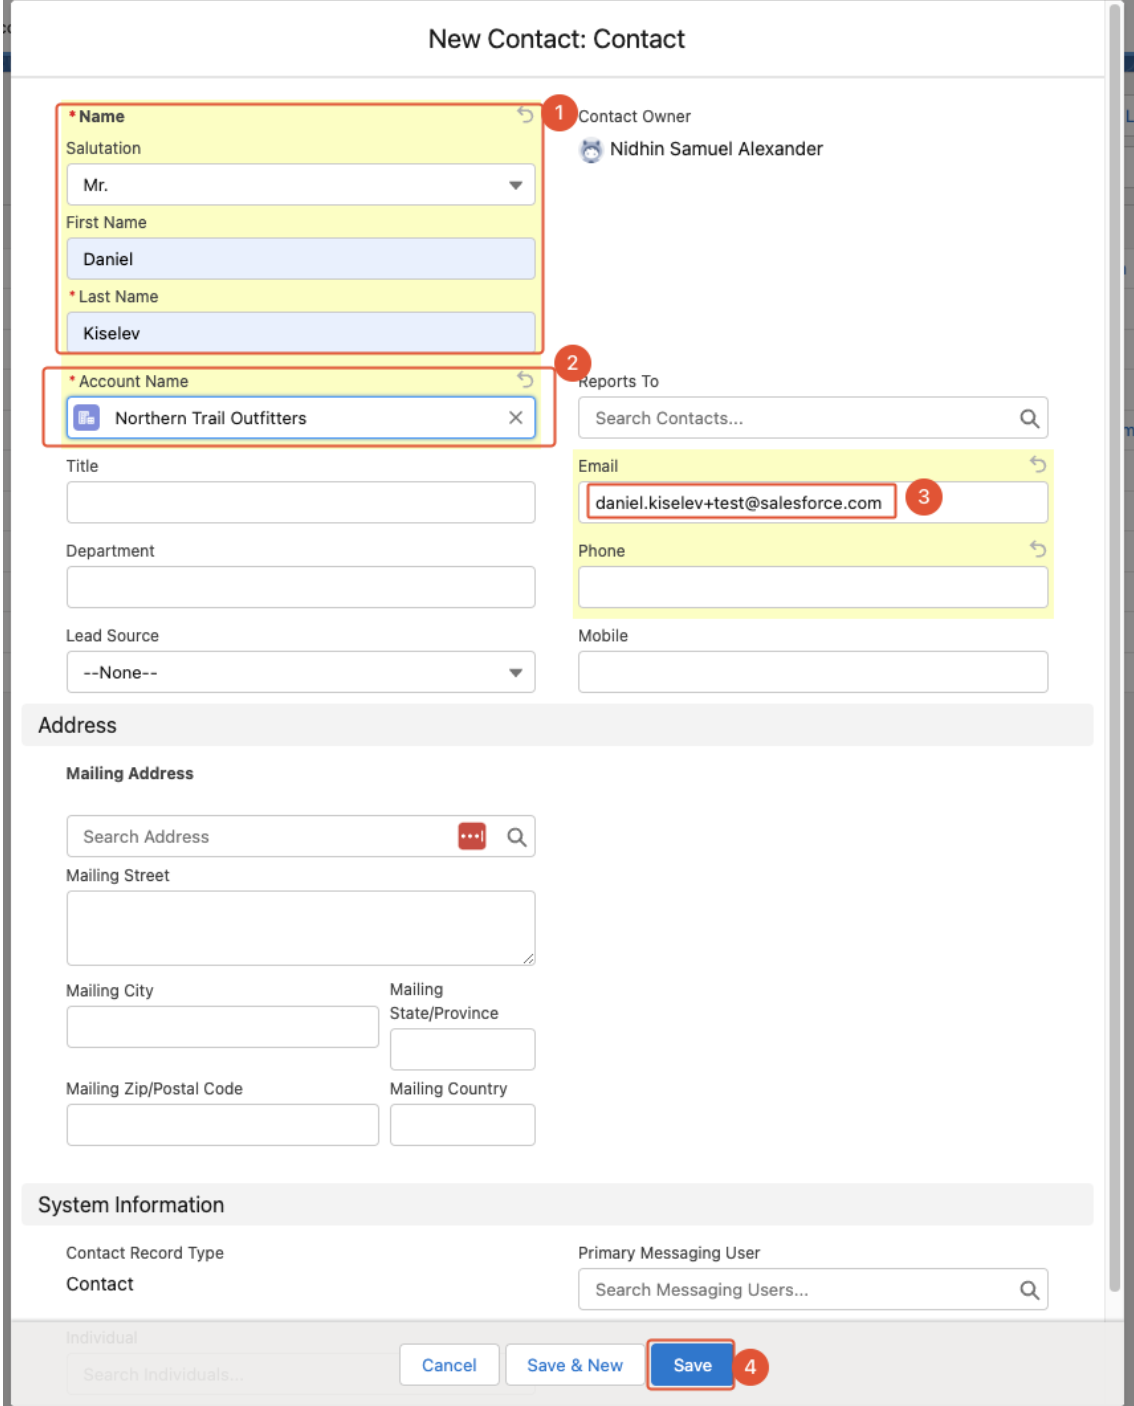
Enter your first name and last name
-
Type or Select 'Northern Trail Outfitters' as Account Name
-
Enter your email
-
Click Save
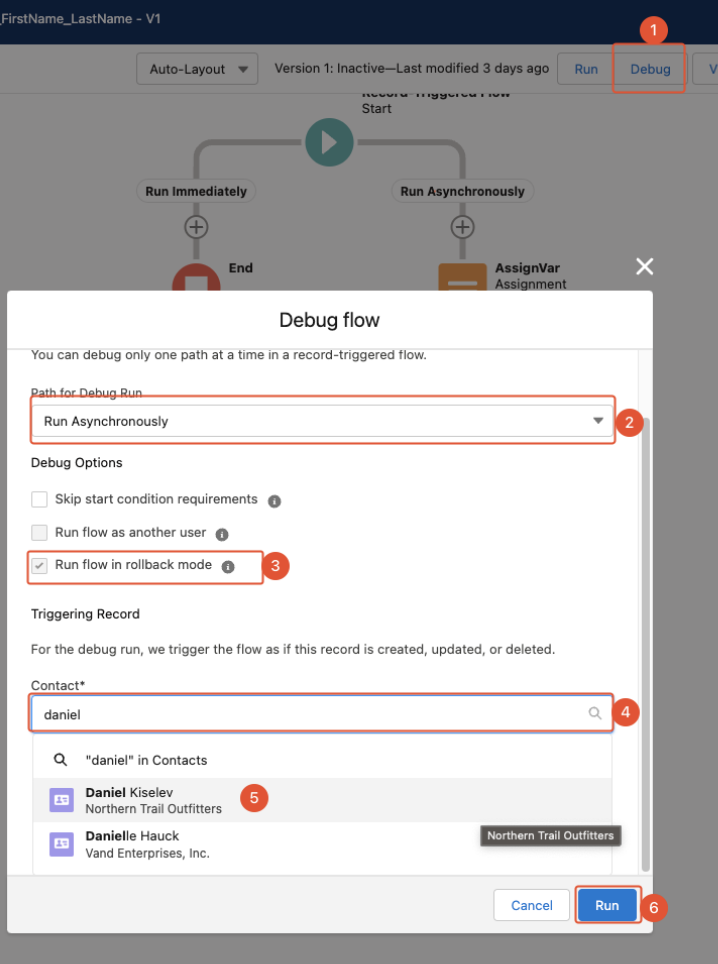
Once Contact is created, we can navigate back to our flow that we saved and let’s debug our flow against the contact we just created.
-
Click Debug button
-
Make sure to select the path to Debug as 'Run Asynchronously'.This is because our path for Run immediately is empty.
-
Under Debug options, only select 'Run flow in roll back mode'
-
Type your first name in Contact text box.
-
Select the Contact(the one we created in above step with your first and last name)
-
Click Run
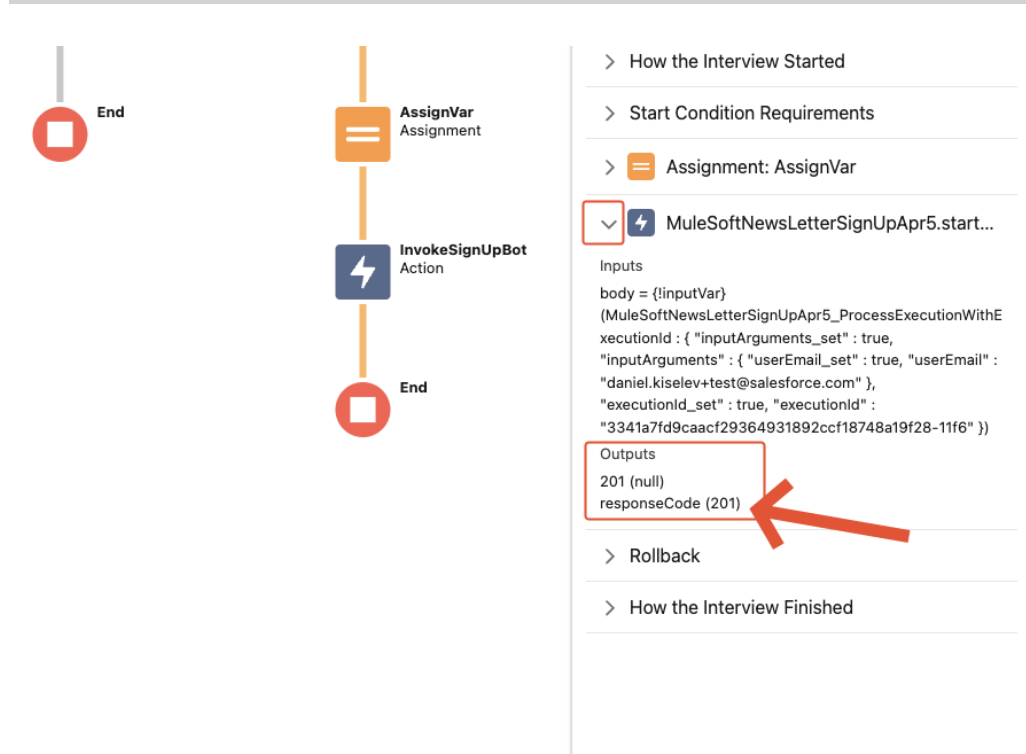
Upon successful execution of the flow, we should see the success path highlighted in Orange.We can validate the data movement by expanding each of the steps the flow touched.For example: we can expand the action element 'MuleSoftNewsLetterSignUpApr5.startProcess' in the right panel and can validate the inputs(should be your email you provided when created the contact) and the response code 201 illustrates that the flow execution was successful.
You can add additional logic like adding a decision element to check for successful or unsuccessful invocation of RPA and send an email for notification.
Please proceed to Publishing Automation Assets to Anypoint Exchange